By Gennady Shapiro, DDS, Glendale, Calif
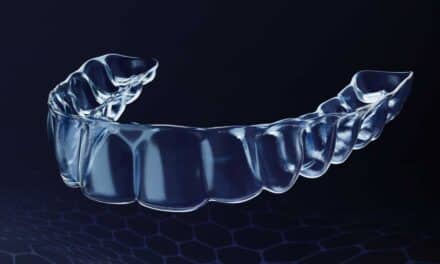
 Figure 1: Handpiece and .018″ round-tip diamond used to thin and score engager template along central fossae in mesiolingual direction.During most orthodontic treatments utilizing clear aligners, a practitioner needs to bond buttons (also known as engagers or attachments) to facial surfaces of patients’ teeth. This is accomplished by the use of engager templates. Such templates contain facial “boxes” that are filled with composite and placed on patients’ teeth, bonded, and cured in order to create 3D volumetric “buttons.” Such buttons allow more predictable, efficient, and precise movements by giving the aligners more strength to extrude, intrude, or rotate the teeth into the desired position.
Sometimes, due to imperfect compliance or other factors, I find the engager template is visibly not down onto the occlusal/incisal surfaces. There are times when gentle force application will seat the template completely, but sometimes that is not the case. Since placement of engagers will direct multiple forces in precise directions, their positioning must be correct or the case might not run its proper course. I have utilized the following solution for just this event. I simply deliver the engager template to the patient as a next set of trays 1 to 2 days before the engager placement appointment, and ask them to wear these instead of the current appliances, and then make sure they wear it in the same manner. By the time they return to have the engagers placed, the trays are now always seated perfectly, and exact engager positioning is achieved every time.
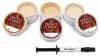
 Figure 2: Surgical suture scissors used to cut template along central fossae. As far as the engager placement process goes, the engager template needs a separating medium to be used. Without it, composite will stick to the template, and during removal newly placed engagers can be broken off the teeth. To avoid this, I mix Vaseline with Die-Lube liquid separating oil at a 1-to-4 ratio. Vaseline, being too viscous, might stay inside the engager, forming a spot, and may distort the final engager shape. Mixing it with Die-Lube creates an excellent separating medium for this type of work.
 Figure 3: A curette gently lifting and separating the remaining template part in a buccal direction, thus avoiding lateral torquing and damaging the newly formed engager.Properly formed and bonded engagers mean a very tight fit of the engager template to the patient’s teeth. Removal can scratch mucosa or break/chip newly formed engagers even with a separating medium and care. An easy fix for this is to cut the engager template along the central fossae mesiodistally. With a medium-grit diamond bur, I thin out a few spots along the central fossaes of molars (Figure 1). Then, using Curved Goldman-Fox scissors, I create small “snaps” or cuts all along occlusal in mesiodistal directions (Figure 2). I then gently lift the areas around the borders of the cuts with a curette (Figure 3). By now, the templates are easy to cut along the occlusal surfaces. This allows me to separate the buccal and lingual parts of the templates. The removal is very easy, free of mucosal nicks and scratches, and very comfortable for the patient. Full buccal movement of that part of the template assures that engagers keep their intended form and position from the first placement.