Strategic sequencing with MARPE and AirFlex aligners achieved stable skeletal expansion and optimal occlusion in an adult patient after previous treatment failures.
By Neil Warshawsky, DDS, MS
“I had 7 years of orthodontics, and I don’t like my smile.” —Patient’s chief complaint
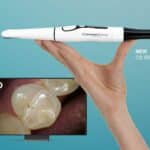
Just before the end of the year, we were heavily overbooked at the Craniofacial Center at UI Health when I was asked to take a “quick” look at a nursing student home for the holidays. I did not know her, as we did not provide her previous care. On exam (Figure 1), I noted a crossbite and recommended an expander followed by orthodontics. The parents explained she had already completed treatment with two expanders. I informed them we could still correct her crossbite, but with her cleft palate history, a tooth-borne expander was not an option. The patient wanted treatment but not braces, as she was in college. Two days before Christmas, I placed a MARPE, introduced her to Grin teledentistry, and wished her a happy holiday. My plan was to see her at spring break after expansion (Figure 2), take records for OrthoFX AirFlex aligners (Figure 3), and then deliver and monitor the case remotely.
Diagnosis
• Inadequate overbite/overjet
• Anterior open bite
• Congenital cleft palate
• Previous orthodontics failed to correct the crossbite
• Dark buccal corridors that exacerbate the posterior crossbite (patient’s chief complaint)
Treatment Plan
For complex cases like this, I plan ahead to treat the patient in phases instead of going through all aligners and then taking a refinement scan, as it’s challenging to achieve a predictable finish from just one scan when using a MARPE with aligners.
The patient was sensitive about the diastema created by the expansion. I explained it was necessary to achieve a long-lasting result. She agreed to the process but requested that her diastema be hidden as soon as possible. I incorporated a pontic starting the day I took records (we hand-built a tray the same day), then I had a pontic incorporated into the first 10 AirFlex aligners (Figure 4).
Aligner Sequencing:
• Treatment Plan 1: 28 stages (delivered 23)
• Treatment Plan 2: 16 stages
• Treatment Plan 3: 11 stages with vertical elastics to close the bite
• Treatment Plan 4: 3 overcorrection trays to make sure the diastema was tightly closed
• In total, 53 stages were delivered over a period of less than 16 months. Note that, during treatment, the patient was unavailable for 2.5 months while she was studying for board exams.
Auxiliaries:
• Class III crossbite elastics on the patient’s right from lingual upper first molar to lower canine.
• MARPE active for 60 days. Bands were removed day 60, and the box screw was retained for 4 months. Total expander time was 6 months.
• An aligner with a pontic was immediately fabricated on the removal of the MARPE bands.
• Rectangular composite bite blocks were used on the molars to encourage molar intrusion.
Next Planned Treatment Phase
AirFlex has unique properties, allowing it to stand out in a very competitive field. Developed by one of the original pioneers in clear aligner polymer technology, it is designed to move teeth with optimal, sustained forces similar to NiTi archwires. However, the gentle nature of the material can be a disadvantage in the finishing stage, when sometimes you simply need to push a tooth into its final position. It is these little movements that often haunt us at the end, as opposed to the larger global movements of a case which we often tackle with efficiency and good treatment planning. Similar to how most clinicians would agree that treating a case with a single round NiTi wire is a disservice to the patient, I personally believe that treating a clear aligner case in a single material is a disadvantage as well. Different phases of treatment often require variable force characteristics to get a tooth into final position.
This need for precise control inspired the addition of a finishing material into the AirFlex system, called PrecisionFinish—a proprietary material designed to achieve final tooth movements without the need for overcorrection for detailing. Since this was one of my first cases using it, much was learned, and at that time it was ordered through a refinement request. Today, PrecisionFinish is automatically included in the final stages of AirFlex treatment.
Treatment Plan 2 (Figures 5 and 6) utilized vertical elastics to assist the trays toretract the anterior teeth and close the bite vertically. Elastics were used to back up the mechanics and assist the trays to pull the teeth together. Since AirFlex in general is so gentle, I prefer to apply the hooks directly on the teeth. I design my trays with cutouts to make sure no additional strain is placed on the tray to maximize its efficiency.
The results of Treatment Plan 2 (Figure 7) showed very good control of the vertical dimension. At the completion of aligner 16 per my original treatment strategy, I took additional records to further reduce the overjet and establish a proper overbite.
Treatment Plan 3 included 11 stages of additional treatment designed to reduce the overjet. It completed the delivery of anterior crown torque, vertically settled the anterior teeth, and established incisal guidance.
The esthetic results are obvious (Figure 8). The patient did have a concern, however, at the end that there was a mild black triangle visible between the upper central incisors—a potential side effect of expansion.1 We plan carefully to attempt to prevent such issues from occurring but sometimes they cannot be avoided. To address her concern, I provided three overcorrected aligners to compress her interproximal contact. I performed a mild amount of IPR to assist in the final closure of the black triangle.
Treatment Summary & Results
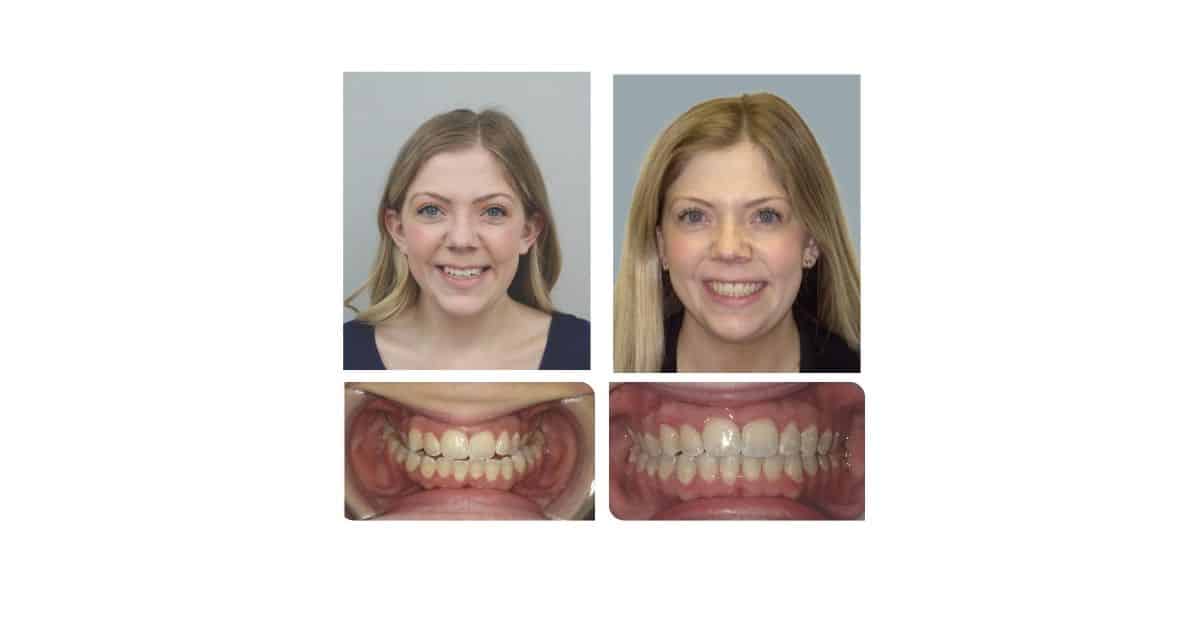
The phased treatment plan corrected the occlusion. All dark buccal corridors were eliminated. The application of a new material, PrecisionFinish, helped achieve optimal aesthetics and occlusion with the AirFlex technology. Follow-up records (Figure 9) taken at a retention check appointment indicate a stable result. A comparison illustrates the patient’s transformation (see opening image).
Summary:
• Improved smile architecture and dental show.
• Maxillary crossbite was successfully resolved through orthopedic expansion.
• Improved facial balance and soft tissue support.
• No surgical assistance was required.
Treatment Metrics:
• Treatment Time: 15.5 months
• Number of Stages: 53
• Number of Attachments: 11
• Number of Office Visits: 9
Retention:
• Upper fixed flat braided wire canine to canine with an overlay aligner.
• Lower fixed .032 triple Twisted cable (Unitek) spanning between the mesial pits of the lower first bicuspids. OP
All photos courtesy of Neil Warshawsky, DDS, MS.
Reference:
- Tarnow, D. P., Magner, A. W., & Fletcher, P. (1992). The effect of the distance from the contact point to the crest of bone on the presence or absence of the interproximal dental papilla. Journal of Periodontology, 63(12), 995–996. https://doi.org/10.1902/jop.1992.63.12.995

Neil Warshawsky, DDS, MS, is the founder and owner of Get It Straight Orthodontics, a leading orthodontic practice in the Chicago area. He holds a DDS, MS, and Certificate of Orthodontics from the University of Illinois at Chicago. A board-certified orthodontic specialist since 1992, he has been teaching at UIC for over 30 years and has served as Director of Orthodontics since 2011. Disclosure: Warshawsky is a speaker and key opinion leader for OrthoFX.