When I speak to any group of orthodontists, I usually address two key segments within the audience. First are the younger ones—those less than 10 years out of school. They may have experience, but they grew up surrounded by technology. The other group—of whom I consider myself to be one—remember the more primitive days. I’m talking about dental impressions, casts, and paper trails that could go from here to the coast (choose the coast furthest from you for full effect).
Digital technology has rapidly changed the orthodontic profession. I’m amazed at the innovation we’re seeing today. The paper trail is fading fast, and digital workflow is quickly becoming the norm. And now, many practices are discovering the benefits of digital workflow and 3D printing.
That’s what I want to discuss today. I sent team tops out to speak to a few of the folks on the frontline of digital workflow at Atlanta Orthodontic Specialists (AOS) to learn more about the specifics of digital workflow and the 3D printing process. For the sake of transparency, that’s also where I practice.
The Benefits
Today, when we talk about digitally enhanced orthodontics on the clinical side, there are four main categories at play: fixed appliance/archwire construction, indirect bonding, aligner construction, and retainer/auxiliary appliance construction. And when it comes to the role of the digital workflow and 3D printing, there are a number of benefits when it comes to digitally enhanced orthodontics that we identified.
Flexibility is one of the key benefits of digital workflow. Each orthodontist has specific needs within their practice. In-house labs can choose to make their own 3D models and aligners, or can work with a vendor to fabricate them. Typically, digital models are stored as STL files, which can be imported into your treatment planning software for internal use or exported and sent to a lab.
Reliability is another benefit. Digital files don’t get lost in shipping. They’re instantly reproducible and can be easily and safely accessed by everyone on your team. Best of all, digital models can’t be dropped on the floor and broken, irretrievably.
Digital workflow can also reduce start-to-finish times in your processes. With good organization and workflow, lab cases can be produced faster in-house. That’s a benefit that the patient really loves—less time spent waiting to get their appliances!
Digital Workflow Step-by-Step
To get started, let’s begin with a working definition of digital workflow. This is the means by which hardware and software create models of the hard and soft tissues of the mouth and face. It’s electronic documentation of the current state of the patient’s mouth. At AOS, a patient’s record includes photos of the face and teeth, intraoral scans, a cephalometric analysis, and a 3D CBCT scan. In addition, you will find notes that pertain to the treatment sequence, patient background, perceived challenges, and caveats.
The digital models are then manipulated to create the tooth positions as they will be after treatment.
Let’s look at a quick step-by-step overview for fixed and removable appliances.
Fixed Appliance Construction
Step 1: An intraoral scan and a CBCT scan are taken.
Step 2: The intraoral scan and CBCT are merged into a single, 3D model that includes cortical bone of the skeleton, the crowns and roots of the teeth, and the gingival tissues. It may also include the skin, lips, nose, and eyes of the patient.
Step 3: The digital model is imported into treatment planning software. The data is cleaned up, and the doctor generates a treatment plan. This plan is a manipulated model of the final tooth positions with software-generated archwires needed to achieve these positions. The software may also generate custom brackets for use lingually or buccally.
Step 4: Deliver the appliances.
Aligner and Auxiliary Appliance Construction
Step 1: An intraoral scan and a CBCT scan are taken.
Step 2: The intraoral scan and CBCT are merged into a single, 3D model that includes cortical bone of the skeleton, the crowns and roots of the teeth, and the gingival tissues. It may also include the skin, lips, nose, and eyes of the patient.
Step 3: The digital model is imported into treatment planning software. The data is cleaned up, and the doctor generates a treatment plan. This plan is a staged model sequence of 3D models showing the progressively corrected alignment of the teeth. Treatment can be done in as little as two to three steps or more, depending on the severity of the malocclusion.
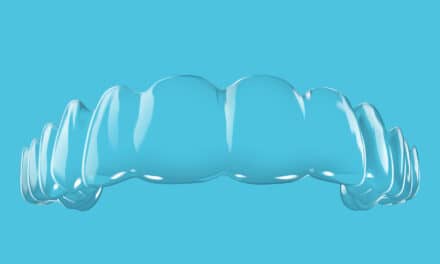
Step 4: Now we’re ready to print. In the case of aligners, we export the file for each stage to the 3D printer. The staged models in the treatment plan are then printed out. For auxiliary appliances, a single model may be printed.
Step 5: The appliances are fabricated.
Step 6: The appliances are delivered.
Digital Indirect Bonding
Indirect bonding (IDB) done fully digitally is a special beast. It is what we—as orthodontists—have wanted but could never achieve at the level that digital indirect bonding can do. IDB done on stone models on the original malocclusion is a hit-or-miss prospect. It is guided by the incorrect notion that perfect bracket placement—achieved merely by visual inspection of the bracket location relative only to its partner tooth—will yield a perfectly esthetic result with ideal occlusal contacts. This false notion ignores variations in tooth morphology and lacks the precision required.
Imagine your ophthalmologist performing your lasik surgery wielding a hand-held light sabre. Not on my eyes you don’t! And not on my eye teeth either.
Digital IDB allows placing the bracket on the tooth with all its own morphological variation so that the archwires will fall within a single, flat plane, and most importantly, set on the digital model that is the precise, planned endpoint of your treatment plan. Digital IDB is the only IDB that meets today’s standard of care.
3D Printing
3D printing is the Apple iPod of orthodontic technology—we didn’t know how much we’d like it until we had it. Initial costs for setting up a 3D printer can seem daunting, but time saved and the money it generates for your bottom line make it worth it.
Whether you send a case out or have it made in a lab in your office, the lab techs will take the digital files from the treatment planning software and import them into the printer software. Once printed, the new 3D models will have any interproximal undercuts blocked out with wax. Some software—suresmile for instance—can digitally block out undercuts before the models are printed. This helps provide a smoother insertion path in the case of aligners. The appliances are then thermoformed to fit the teeth. Once this is done, the lab tech cuts away excess aligner material and smooths the edges. A full set of staged treatment aligners can be produced all at once to save both time and money. Auxiliary appliances will require other steps.
Note: One perk that I quickly discovered about digital scanning is that I am able to create a treatment mock-up in about 10 minutes. From there, I can show the patient—while they’re in the chair—their scan and an accurate illustration as to the steps we’ll take for their realignment. It’s very accurate and even helps generate patient excitement for the process since they better understand the treatment plan and the desired results. They also love the idea of fewer visits and less time in the chair!
But one of my favorite stories is about the woman whose son lived in a city some 1,000-miles away. The son had lost his aligner, and mom was desperate to get a replacement. The orthodontist was able to pull the son’s digital file and print the aligner that afternoon. He then boxed up the appliance and overnighted it to the son. That’s less than 28 hours between losing it and replacing it.
In case you’re considering getting a 3D printer, here are a couple of thoughts to keep in mind. First, depending on how many aligners you want to make, it would be a wise move to hire a new staff member who can become totally devoted to it. You’ll need space for a lab. Storage shouldn’t be as big a problem as it is for stone models. You’ll require less space for the new aligners than the models. I’m delighted to tell you how great it is to have digital files that are immediately available instead of digging through paperwork, X-rays, and model boxes trying to find a case for review.
As each practice is unique, so are the available printer options when it comes to selecting a 3D printer. A good printer rep can guide you to get the most bang for your buck in your specific practice situation. Required elements for 3D printing include an intraoral scanner, camera, 3D printer, thermoformer, and 3D imaging software.
To sum up, technology is making our profession better. We are experiencing faster and better results and witnessing financial gain as a result of digital workflow. 3D printing done in-house is faster, gives you more control, and also increases your profits. OP
Mark Sanchez, DDS, is a practicing orthodontist and the founder, CEO, and chief developer for topsOrtho practice management software. He would like to thank some of the amazing folks at Atlanta Orthodontic Specialists, where he practices, who gave his team time to pick their collective brain for their digital workflow and 3D printing wisdom. They include digital services manager Julie Blauw, and lab techs Kennifer Glaze and Daniel Calle.


