Electronic dental anesthesia can improve patient comfort, elevating the orthodontic experience and renewing interest in your practice.
By Lisa Alvetro, DDS
Orthodontic treatment can often be uncomfortable, with brackets, wires, aligners, and appliances irritating patients’ soft tissues and causing teeth to become sore. But what if we had a way to make orthodontic treatment easier on our patients? Now, we do—it’s called the Synapse Dental Pain Eraser.
High-frequency neuromodulation has been in use since the 1960s for the management of craniofacial pain and today is a standard of care in spinal implant management of neurologic disorders. The introduction of the Dental Pain Eraser is applying this sound and validated technology to the management of the neural response in the oral cavity.
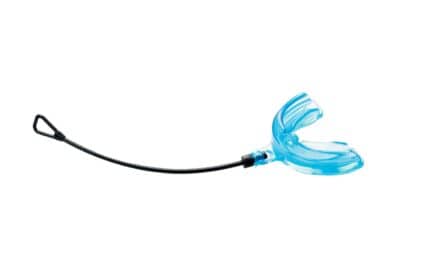
This device is the world’s first pen-shaped, portable electronic dental anesthesia solution that uses patented Advanced PulseWave neuromodulation technology to send gentle, subsensory electric pulses to calm the nerves in the mouth and block both soft and hard tissue pain. When the Dental Pain Eraser’s metal prongs are applied to a sensitive tooth or a sensitive gum tissue area, the pain will begin disappearing in seconds, with pain relief lasting for up to 48 hours. It can be used both in your clinic and as a take-home device for your patients.

Use cases
The Dental Pain Eraser (DPE) offers numerous applications in an orthodontic practice. Consider these uses: prior to wire engagement, when teeth become sore from movement, tying in exposed maxillary cuspids, adding new brackets or appliances, trauma, and before debonding.
Application in a slow, gentle, “erasing” motion around the root surface or directly on mucosal tissue will vary to the concentration of free nerve ending and the level of sensitized excitation. Times of application will vary from a minimum of 30 seconds of applying both prong tips around an aphthous ulcer, initial appliance application (fixed braces or aligners) with average 10 to 15 seconds per tooth along the full root surface, wire adjustments/detailing, to a 3-minute application at pre- and post-TAD placement or removal and pre-needle. Here are three common use cases of the Dental Pain Eraser in my practice.
- Debonding. This is an exciting time for patients, but it can also be uncomfortable due to the air from our handpiece causing sensitivity. By applying the Dental Pain Eraser before debonding, we can make this a smooth and painless procedure, allowing the patient to fully enjoy the excitement of getting their braces off. For soft tissue application, you will need both prongs touching and apply along the affected area for an average of 2 to 3 minutes (Figure 1). For hard surfaces, you will need to hold both prongs on the surface without moving the Dental Pain Eraser for an average of 2 to 3 minutes as well. (Keep in mind some patients may need 3 to 5 minutes).
- Adding New Appliances. To ensure that patients have success when new appliances are added, we find using the DPE highly beneficial. We review the use of it and demonstrate application techniques whenever we are adding a Forsus Class II Corrector or an expander (Figure 2). Preventing discomfort and empowering patients to alleviate their own pain benefits both the patient and the practice. We experience fewer emergency calls related to pain and discomfort. With the Forsus spring rubbing against the cheek, the patient may find the cheek to be the most affected area of discomfort. With the DPE, they will need to apply along the affected area for an average of 2 to 3 minutes. (Keep in mind some patients may need 3 to 5 minutes.)
- Dental Trauma. We all receive calls from patients, their parents, or schools when dental trauma has occurred. We know that managing these incidents can be uncomfortable, but it is necessary for our patients’ wellbeing. Imagine being able to reposition luxated teeth without the use of an injection. By applying the DPE to the soft tissue and the involved teeth, these procedures can be accomplished pain-free. Figure 3 is an example of an emergency visit where my chairside technician applied the DPE to the trauma site (4 to 5 minutes on the gingival area and held on the tooth surfaces for 4 to 5 minutes) to make treatment comfortable for the patient without the use of an injection. The patient reported that she also found the take-home unit helpful for the next several days.

The benefit of alleviating pain and discomfort using the DPE is obvious; however, a benefit that is often overlooked is the relief of anxiety associated with treatment. When patients are concerned about the pain or discomfort they might experience during orthodontic treatment, you can see the relief on their faces when we introduce the Dental Pain Eraser. Introducing this device into your practice not only demonstrates your compassion and understanding of their anxiety, but also empowers patients by giving them a sense of control over their treatment.
READ MORE: Oral Pain Relief Device Captures 2023 Ortho Innovator Award

Practice integration
To successfully integrate the Dental Pain Eraser into your practice and maximize its effectiveness, it’s essential to get your team on board. The onboarding process provided by the Synapse Dental team is incredibly valuable, so be sure to take advantage of it. This process allows your team to experience the device firsthand. Encourage your team to use it on their patients by making it as easy as possible. Ensure that each clinical chair has a unit available, along with replacement tips, so every clinical technician has everything they need at their fingertips.
Create a list of procedures where the use will be beneficial and encourage your team to start the application as soon as the patient is seated—without waiting for the doctor. Track usage among your team members and have those who use it the most share their patient experiences with the rest of the team. This will encourage others who want the best for their patients, too.
Patient education
Once we decided that every patient would receive a DPE, it was essential to ensure that every patient knew how to use it properly. My recommendation is to have the device available at the start of the appointment. After I hand the parent the device, we open it with them to show that instructions are included. I then review the list of possible uses and encourage them to review the rest of the enclosed literature.
The next step is to demonstrate it in the patient’s mouth. The clinical technician can simply place the device in an area of concern, show the patient how to turn on the appliance, and explain what the application feels like. We then have the parent, if the patient is a very young child, or the patient apply the Dental Pain Eraser to an area of potential discomfort (Figure 4). It’s beneficial to do this even before the initial wire engagement. Imagine tying in high cuspids or engaging severely rotated lower incisors knowing you have just given the patient the tool they need to completely control their discomfort.
Explain to the patient what they can expect in terms of relief, noting that while they should experience relief, the duration may vary depending on the location, the patient, and how long the device is applied. I encourage patients to reuse the device if they start to feel discomfort again; there’s no risk of overuse, and you cannot hurt yourself by using it too much. While there is a limit to how much medication you can take or how often you can take it, a huge benefit in using the Dental Pain Eraser is that it can be used as often as needed.
Make sure that the patient and parent understand that all of the prongs must be touching the surface area for the conduction to work. The best analogy I’ve come up with is batteries. Often, you may replace the batteries in something, and it doesn’t work when you turn it on. Then you try the batteries again and realize that the batteries were not seated completely. This analogy seems to resonate with patients because, when someone says the device isn’t working, we often find that only one prong is touching the surface. Patient education is crucial to maximizing the benefits.

Set your practice apart
Ben Gregg, DDS, a practicing orthodontist and managing partner of Bloom Orthodontic Consulting, recommends the Dental Pain Eraser to differentiate your practice. He stresses that it is important to develop an internal and external awareness campaign. Consider adding your logo to the device to make pain relief and comfortable orthodontic treatment a part of your brand. This branding opportunity not only reinforces your commitment to patients’ comfort, but also helps patients associate your practice with innovative, compassionate care and helps you build stronger relationships with referring offices.
There are several ways to integrate the device into your practice. One option is to make it available for purchase by your patients. Another approach is to bill the insurance company, but I have found the most effective means is to provide it to all patients as a value-added service. The DPE should be considered as standard of care, equivalent to how retention is prescribed. We all want orthodontic treatment to be as comfortable and enjoyable as possible and offering the Dental Pain Eraser is an excellent way to achieve this goal.
It is important to be strategic in how you introduce this device. I recommend presenting the Dental Pain Eraser during their initial appointment. As the doctor, I personally introduce the device to patients while Treatment Coordinators reinforce its benefits throughout the course of orthodontic treatment. We also explain how the take-home patient device can be taken to and used during routine dental procedures such as cleanings, restorations, or when injections are necessary.
To further raise awareness, it’s beneficial to display the Dental Pain Eraser prominently throughout your office, especially in the waiting room, so patients can see it and inquire about it. Additionally, we found it essential to feature it on our website. This ensures that potential patients and their parents can learn about the technology we use to enhance comfort. This alone may set our practice apart from others in the area. Including instructions for use on your website is also important, as it provides a resource for patients who already have the Dental Pain Eraser and need additional guidance at home.
Finally, I encourage patients to keep the Dental Pain Eraser even after they are done with braces. You never know when you might need it again. OP

Lisa Alvetro, DDS, has been a solo, orthodontic practitioner in Sidney, Ohio, for over 30 years. She received her dental degree summa cum laude from Ohio State University in 1991 and completed her orthodontic residency at Case Western Reserve University in 1993. She continues to be involved with CWRU orthodontic department as an associate clinical professor. Considered an early adopter of technology, she and her team established Alvetro 3D lab in 2017.