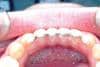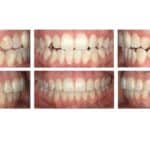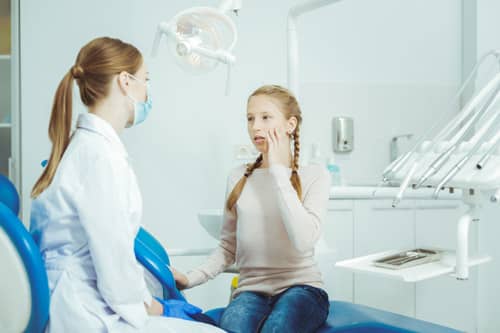
Bond failures…the nemesis of an efficient orthodontic practice.
The original information on bonding to enamel was developed by Buonocore and has now been used for more than fifty years.1 While keeping in mind that contemporary bonding adhesives have engineered failure intended to prevent pulling enamel from the tooth surface during the debonding process, what we are describing here is the undesired failures occurring at a much lower force level that may interrupt treatment progress.
Numerous articles have analyzed bond failures; however, the underlying premise tends to assume most orthodontists and their teams have a good understanding of the orthodontic bonding process and follow proper techniques. Given the prevalence of bond failures, perhaps it is time to review the importance of proper bonding technique and discuss some additional measures that can be taken to reduce the most common and frustrating repair in an orthodontic practice.
The Literature
According to Anoop Sondhi, DDS, MS, bond failures “are invariably more expensive than most of us realize,” and “Include front desk time in taking the phone call from the patient, scheduling the patient, untying an archwire, preparing the tooth, rebonding the bracket, and retying the archwire…. Add to that the cost of tray set ups, sterilization, etc” and Sondhi estimated a single bracket bond failure in 1999 cost anywhere from $70 to $200.2 If we simply apply the cost of living increase to his estimate, the cost is as much as $300. Based on data collected from three independent practices of Frey, Paschal, and Paquette, the average cost per repair could actually exceed $330.3 (It is important to note that amount does not include the additional cost incurred if treatment progress is delayed due to the loose bracket.)
According to Vijayakumar et al, the number of debonds after 6 months of treatment was 9.6% (calculated by number of loose brackets divided by total brackets bonded).4 This number is very close to the mean Miller reported as orthodontists’ self-disclosed levels of bond failures. Miller proposed steps to reduce the bond failures in his practice down to as low as 3%,5 while Miles reported an average bond failure of 1.6% which is significantly lower than most other reports.6 A 2013 Cochrane Review by Hu et al showed no difference between traditional etch and self-etch primers. It should be noted that they found most studies were of low quality and essentially questioned their own ability to form a conclusion.7
The Details
Orthodontists can routinely reduce bond failures by paying attention to the details involved in the process. Keep in mind that adhesive strength is based on intimate adhesive contact on both the bracket and tooth surfaces; and that, typically, the thinner the adhesive, the greater the bond strength. A simple explanation for new chairside assistants is: If you were to place a drinking glass on a counter where there is a small amount of moisture leaving numerous air bubbles under the glass base, you could lift the glass with little difficulty. But if there was enough moisture that the entire bottom of the glass was in intimate contact with the moisture as was the counter, it is virtually impossible to lift the glass off the counter. And finally, if there is an abundance of moisture on the counter, one simply needs to tip the glass (similar to orthodontic rotational shear forces) and the glass easily lifts off the counter.
It is important to keep the amount of movement of the bracket during placement to a minimum (when the adhesive may be prematurely exposed to light) to prevent disruption of the polymerization process thus weakening the cohesive strength of the bond. In the following procedure, I will assume maximum cohesive strength and focus on the adhesive-enamel and adhesive-bracket interfaces. On that note, one can tell the interface where the breakdown occurs by examining the bracket and the tooth. If all the adhesive is on the tooth, then one knows there was some form of contamination or technique error applying adhesive to the bracket. If all the adhesive is on the bracket, then the error occurred at the tooth. If there is some on both, then there is a cohesive failure of the adhesive, either as engineered or due to inadequate polymerization.
Self-etch primers require a specific technique and will not be covered in this review. For those who use a traditional etching process and not self-etch primer, the following is an outline of a step-by-step procedure that has reduced bond failures to 1.5% on an annualized basis for numerous practices.
The Procedure
1. Clean the teeth. Chairside assistants are often ill prepared for proper bonding techniques. Especially lacking seems to be training on how to properly prepare teeth for orthodontic bonding. Use raw pumice (absolutely never use prophy paste that contains fluoride). Even non-fluoride prophy paste contains flavoring compounds that may leave etch resistant residue.
2. Microetch the surface. One of the issues we face as orthodontists is the variability of the enamel surface and the potential resistance to uniform etching. In order to reduce the surface tension, or provide a uniform surface for applying phosphoric acid, it has been suggested to microetch with aluminum oxide using the Groman Dental Etchmaster® (Groman Dental) or something similar prior to applying acid etch. Miles found no statistical difference between use of microetching and no microetch before phosphoric acid application, even though his results showed half the rate of debonding with microetching first.8 Given the cost per loose bracket, it could be considered as simple insurance against enamel surface variability as well as compensation for other potential errors in technique.
3. Etch properly. Use 37% unbuffered phosphoric acid. Although for restorative treatment gel etch may have some advantages, liquid etch is preferable in orthodontics because of the uniform contact with the enamel surface. Oftentimes the biggest shortcoming with newly hired chairside assistants is they want to place the etch and then attempt to rinse it off before it even has an opportunity to etch the surface. The research by Barkmeier et al9 as well as Wang et al10 both confirm that a minimum of 15 seconds per tooth and a maximum of 60 seconds per tooth is ideal. After 60 seconds the bond strength decreases because the enamel rods are excessively weakened. Assistants should either use a timer or count out loud in the traditional “one one thousand, two one thousand, etc.” Most are universally astounded by how long they need to leave the etch on. The other important but often overlooked aspect is not rubbing the enamel surface during the process. The post etch exposed enamel rods are fragile and when assistants rub the surface with a brush they can undo the process as it occurs.
4. Rinse. Rinse. Rinse. The tooth needs to be rinsed as long or longer than it was etched. The byproduct of etching the teeth is calcium carbonate, commonly known as chalk. Most new assistants do not know to rinse long enough and may develop poor technique if not corrected. If the teeth are not properly rinsed, we are applying adhesive to chalk—no wonder the excessive level of bond failures. A simple explanation for new clinical assistants is to explain that if they had syrup on a plate they need to imagine themselves cleaning it by only rinsing it off with running water.
5. Dry the tooth properly. Traditional enamel drying is done with compressed air. “Any user of compressed air will, at some point, see liquid water appearing in the air distribution system. This can be anything from a nuisance to a serious problem, depending on the application. Getting the water out of the compressed air depends on understanding where it came from and what methods are available to remove it. Any liquid or vapor removal process, such as drying the air, costs money.”11 Unfortunately, the adhesives we use are typically hydrophobic, in other words, hate water. For years, orthodontists have used a variety of adjunct tooth dryers, which appear to a casual observer as a hair dryer with a narrow exit tube. These are simply blowing heated, moist air onto the tooth surface. An alternative is to use nitrogen. Nitrogen is a naturally occurring gas that comprises 78% of air at sea level and increases percentage with altitude. Nitrogen has the unique properties that it is non-flammable and does not support water vapor. The latter property is why we become dehydrated while flying in a commercial airliner. After “drying” the teeth with an air syringe, the drying process can be easily completed with compressed nitrogen. By having both a traditional air/water syringe as well as a single plunger nitrogen syringe, it becomes simple and inexpensive. Installing nitrogen lines is simple; one only needs a nitrogen tank, a pressure regulator, and 1/4″ plastic tubing with “tees” at each chair. Because the pressure at the chair is only 40 psi, there is no need for individual cutoffs at each chair. The visible difference in the tooth surface is readily apparent as is the reduction in bond failures.
6. Isolate and protect the dried tooth. Unfortunately, I have observed many assistants who see saliva on a prepared tooth and simply “dry” it again. The problem is that saliva is not water, it is primarily fluid protein. Once the prepared surface is ready for bonding, if it is contaminated with saliva the preparation must be completely repeated: etch, rinse, and dry again.
7. Use a low viscosity primer. Typically, a properly prepared tooth has exposed enamel rods to a depth of 50 microns. A low viscosity resin will “wick” into the prepared enamel and leave a continuous wet surface on the tooth. Once again, a very thin layer is preferred.
8. Use enough resin. There is a fine line between an adequate amount of resin and too much resin. With a traditional wire mesh base the adhesive must be pressed into the mesh to prevent voids and even then voids may be present and unseen with the naked eye; with others such as the HSO Carriere® SLX™ base (Henry Schein Orthodontics), there are pegs that mechanically retain the resin. In the latter situation, a slight convex surface of resin on the bracket base is required to prevent voids and prevent reduced bond strength.
9. Cure the adhesive properly. The length of time necessary for a full cure of the adhesive is dependent on both the adhesive used and the light used. Although the manufacturers have recommended times, it is recommended to also test the combination in your office. In addition, it is important to test the lights on a regular basis to make sure they are delivering the recommended wavelength and strength. One common error that is made by assistants is to shine the light at the bracket or at the tooth. For complete curing under a metal bracket, the light tip must be in intimate contact with the enamel so that the light is diffracted through the enamel to the adhesive, whereas simply shining the light at the bracket can leave uncured adhesive under the bracket. With clear brackets the light tip can simply contact the bracket and the adhesive will cure through the bracket.
Bond failures are frustrating to the staff, annoying and aggravating to patients and expensive to the orthodontist. Although following this process may take a few more minutes of chair time, the cost of doing so is far less than seeing the same patient to repair a bracket that has failed due to inadequate technique. By following stringent bonding protocols, bond failures can easily be reduced to manageable levels. OP
 David Paquette, DDS, MS, MSD, received his dental degree from the University of North Carolina (UNC) School of Dentistry in 1979 and a Master’s in Pediatric Dentistry from UNC in 1983. His Master’s thesis won a national research award that same year. He is board certified by the American Board of Pediatric Dentistry. He obtained his Master’s degree and specialty certificate in orthodontics from St Louis University in 1990. Paquette’s Master’s thesis in orthodontics won the coveted Milo Hellman award in 1991. He is an active member of the Schulman Group. He is currently in the private practice of orthodontics exclusively and is the lead clinical advisor to Henry Schein Orthodontics.
REFERENCES
1. Buonocore MG. A simple method of increasing the adhesion of acrylic filling materials to enamel surfaces. J Dent Res. 1955;34:849-53.
2. Sondhi A. The truth about bond failures. Orthodontic Perspectives. Vol. VI No. 1. © 1999 3M Unitek
3. Paquette D, Frey S, Paschal J. A method for evaluating efficiency. Orthotown Magazine. March 2018.
4. Vijayakumar RK, Jagadeep R, Ahamed F, Kanna A, Suresh K. How and why of orthodontic bond failures: An in vivo study. Journal of Pharmacy & Bioallied Sciences. 2014;6(Suppl 1):S85-S89. doi:10.4103/0975-7406.137394.
5. Miller RA. Beating bond failure. Orthodontic Products. March 2005.
6. Miles PG. Does microetching enamel reduce bracket failure when indirect bonding mandibular posterior teeth? Aust Orthod J. 2008;24(1):1-4.
7. Hu H, Li C, Li F, et al. Enamel etching for bonding fixed orthodontic braces. Cochrane Database Syst Rev. 2013 Nov 25;(11):CD005516.
8. Miles PG. Does microetching enamel reduce bracket failure when indirect bonding mandibular posterior teeth? Aust Orthod J. 2008;24(1):1-4.
9. Barkmeier WW, Shaffer SE, Gwinnett AJ. Effects of 15 vs 60 second enamel acid conditioning on adhesion and morphology. Oper Dent. 1986;11:111-16.
10. Wang WN, Lu TC. Bond strength with various etching times on young permanent teeth. Am J Orthod Dentofacial Orthop. 1991;100:72-79.
11. Parker Hannifin Corporation. Drying Compressed Air Guide Bulletin M261M Printed in U.S.A. 06/13.