 |
| Ken Fischer, DDS |
High, Blocked-Out Cuspids and Invisalign
| Figure 1 |
| Figure 2 |
| Figure 3 |
| Figure 4 |
| Figure 5 |
Ken Fischer, DDS
Villa Park, Calif
Historically, most orthodontists have used Invisalign® aligners to treat cases limited to minor crowding, small spaces, and simple malocclusions. In recent years, due to amassed clinical experience and improved treatment protocols, the scope of aligner treatment has expanded to include almost all malocclusions that usually required fixed appliances. One of those malocclusions is the type where the upper cuspids are blocked out and erupt high and labially (Figure 1).
Most of these cases require the extraction of the four first bicuspids—but how can this be an Invisalign case when those cuspids are so displaced beyond the borders of the proposed aligners? Because bodily movement of the teeth and root control is as important in aligner treatment as it is with fixed appliances, the cuspids must be brought down before taking impressions for aligners.
Once the four bicuspids are extracted, buttons or brackets are bonded to the cuspids and remaining bicuspids (Figure 2)
Elastics are then attached to the diagonally opposed buttons/brackets (Figure 3).
The occlusal forces on the bicuspids will prevent them from supererupting while the cuspids are brought into the extraction spaces. This transposition only takes approximately 2 to 3 weeks, if the patient will wear the elastics full-time (Figure 4).
At this point, the PVS impressions can be taken, the aligners fabricated, and the treatment successfully completed (Figure 5).
 |
| Sebastian Baumgaertel, DMD, MSD, FRCD(C) |
Indirect Anchorage the Right Way
Sebastian Baumgaertel, DMD, MSD, FRCD(C)
Case Western Reserve University, Cleveland
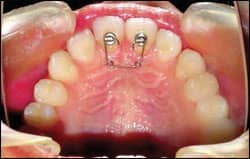
In the July 2008 edition of Orthodontic Products, I introduced you to Dentaurum’s TOMAS T-Wire, an auxiliary that can be used to couple the maxillary teeth to a palatally placed TOMAS Pin to enhance their anchorage value for successful distalization or protraction of the posterior segments—or even for the eruption of impacted teeth. This, of course, is considered indirect anchorage: Any time an orthodontic mini-implant is used to stabilize a tooth or group of teeth via a rigid connector, these teeth become immobile and thus constitute outstanding anchorage teeth.
Planning indirect anchorage is simple; however, installing it can be challenging. While the implant is absolutely rigid in the bone, the teeth have an inherent mobility in the alveolar socket. This discrepancy can lead to bond failures under function, which typically occurs at the tooth-connector interface.
 |
| Indirect anchorage with the T-wire using Flow Tain (black circle) and Heliosit (yellow circle) composites. |
To avoid these failures, I recommend using a lingual retainer composite. I prefer Reliance Flow Tain. This nonbrittle composite is designed to endure this minimal mobility of the teeth without failing (Figure 1, black circle). Using the same composite for the coupling of the connector to the TOMAS Pin would be a mistake, as it does not clean out of the undercuts nicely. Here, a brittle composite is required, which can be easily removed from the TOMAS Pin head by compressing it with a Weingart plier in case the connector requires adjustment. I prefer Heliosit from Ivoclar Vivadent, which, due to its brittleness, crumbles off completely, not leaving behind any remains (Figure 1, yellow circle).
 |
| Chintamani Kale, MDS |
Correcting Anterior Midline Relapses
Chintamani Kale, MDS
Mumbai, India
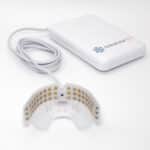
The appearance of an upper midline spacing after debonding and retention can upset the orthodontist and the patient. The use of a simple diastema-closure kit can help close the midline spacing. The spring I use (from American Orthodontics, Shebogyan,Wis) is effective in closure of midline diastemas up to 2 mm.
The diastema closure kit consists of brackets (which are bonded palatally) and a closing spring that gives the necessary force for closure. After 2 weeks, the corrected position of the teeth can be retained with the sectional rectangular wires enclosed in the kit.
As the space closure takes place within 2 weeks, it is a handy appliance when the patient is given a treatment plan for aesthetic dental procedures to correct anterior spaces.
 |
 |
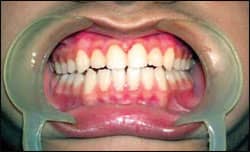 |
| Before treatment | Placement of diastema closure spring | Space closure after 2 weeks |